Well, if you have a tech-related YouTube channel, then you might know the importance of mobile screen recording. Recording the Android screen on a computer is easy as there is plenty of software available for that. However, things become difficult when we have to record the iPhone screen through Mac or Windows PC. There could be several reasons why you might want to record the screen, maybe you want to record the iPhone screen for a tutorial video or want to assist a friend who has just purchased a new iPhone. Whatever might be the reason, there are few possible ways to record iPhone screen through a computer. In this article, we are going to share some of the best methods that could help you to record the iPhone screen on Windows and MAC.
Steps to Record iPhone Screen on Windows and MAC
Below are the 3 best methods that could help you to record your iPhone screen on Windows and MAC computers.
1. Record iPhone Screen On MAC
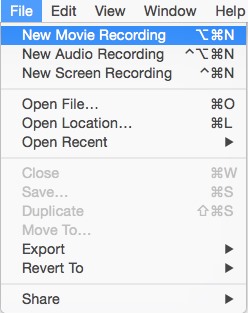
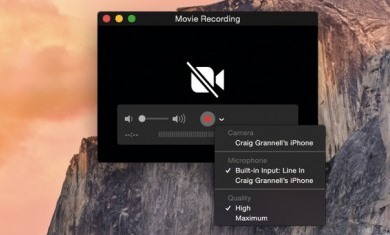
Recording iPhone Screen on MAC is pretty easy and you don’t need to use any third-party software. So, let’s check out how to Record iPhone Screen on Mac 2019. Step 1. First of all, connect up your iPhone device to your Mac system using up the lightning cable. You should see that the connection should be perfect, and there should be no issues related to that. Step 2. Now after you get your device connected to the Mac system, launch up the QuickTime Player on your Mac. Inside this application, you will have to go to the File -> New Movie Recording. This will now launch up the small recording panel on the screen. Step 3. After that, you have to click on the arrow button that is present on the recording panel next to the red record button. If you have your device connected to the Mac, then you will be able to see your device listed on the list that appears after clicking the arrow button. Just select your device name mentioned under the Camera options on the list. Step 4. This will now mirror your device screen on the Mac screen and to record the Mac screen, you will have to click on the record button. Once the recording starts in your iPhone, remember that you should not disconnect the device from the Mac unless it will remove the connection and hence your recording will abort.
2. Using Windows/Mac (Wireless Method)
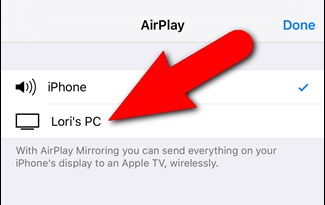
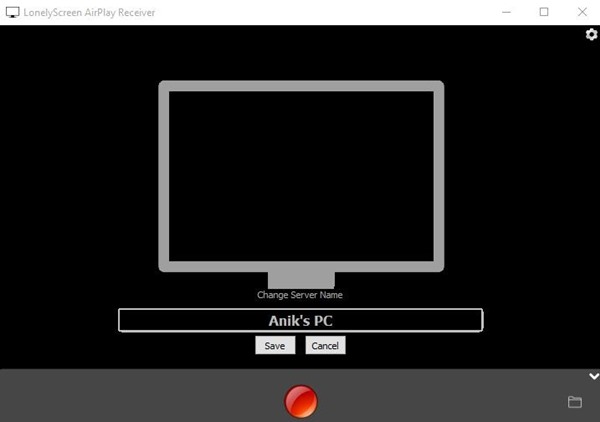
Step 1. Install the computer app named Lonely Screen on your PC and you can find the Windows as well as Mac version of this app. After installing the app launch it up on your PC system. Step 2. Now on your iPhone, you will have to begin the AirPlay Mirroring through options from the control center of the device. And from the search options, you will have to select up the “Lonely Screen“. This will mirror the iPhone screen on the computer wirelessly. Step 3. At last, you will just have to pull the record button option from the computer screen that is done by clicking the arrow on the bottom of the screen. If you don’t record the mirrored screen of your iPhone, just click on the Record Button from there that appears. You can also abort the screen recording by clicking on that button again, and the video that you made will be saved automatically to the designated folders (i.e., Movies/Videos).
3. Using Apowersoft (Windows)
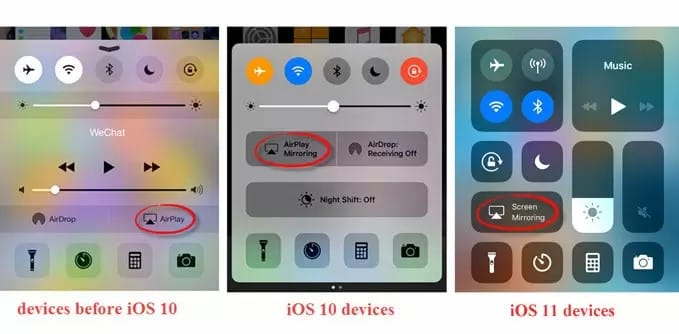
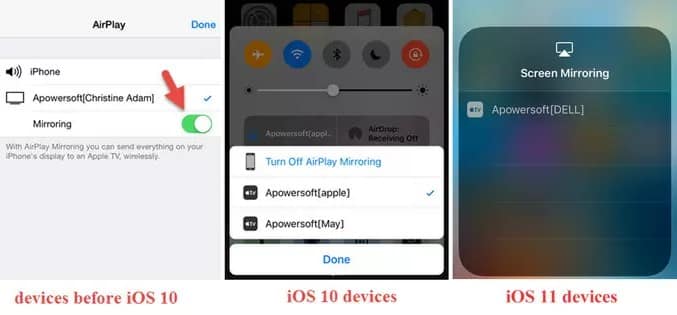
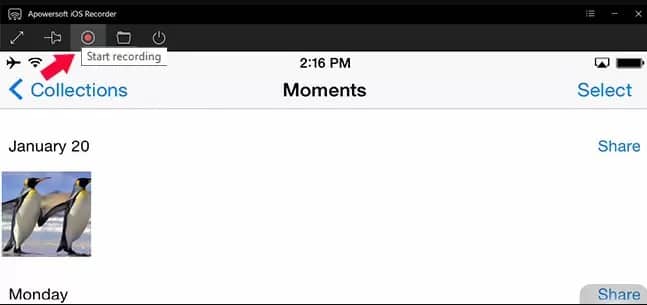
Well, Apowersoft is one of the best and top-rated screen recording and video editing software that you can have on your PC. Recording the iPhone screen is easy with Camtasia. To record the iPhone screen on PC, follow some of the simple steps given below. Step 1. First of all, make sure that both your iPhone and PC are connected to the same WiFi network. Step 2. Download and install Apowersoft iOS Recorder on your Windows computer. Step 3. Now on your iPhone, swipe up from the bottom to access the Control Center. On the control center tap on ‘AirPlay’ if you are using iOS devices before iOS 10. For iOS 10 and above, tap on the ‘Airplay mirroring’ option from the Control Center. Step 4. Once done, Airplay will show you the available mirroring devices within the WiFi network. Select the device, and then enable the ‘Mirroring’ option. Step 5. Now to record the iPhone screen, tap on the ‘Start Recording’ button as shown in the screenshot below. That’s it, you are done! This is how you can record your iPhone screen from a computer by using Apowersoft iOS recorder. Now after knowing the different methods given in this article, you can easily record your iPhone screen using Windows or Mac. If you have any doubts related to this, let us know in the comment box below.
Δ