However, the tab addiction problem is that we tend to lose track of the one we need quickly. Google is well aware of such issues, so they have introduced a handy tab search feature on Chrome 87. The tab search feature adds a drop-down arrow in the top tab bar that shows all of your open tabs when selected. You can use the search bar of the feature to switch between all opened tabs. Although Chrome 87 introduced the new tab search feature, it was limited to Chromebooks only. However, now with Chrome 88, you can use the Tab Search feature on Windows, Mac, or Linux. Also Read: 10 Best Google Chrome Extensions
Steps to Enable & Use the Tab Search Feature of Chrome Browser
In this article, we will share a step-by-step guide on how to enable and use the tab search feature of the Google Chrome web browser. So, let’s check out. Step 1. First of all, head to this link and download the Chrome beta version.
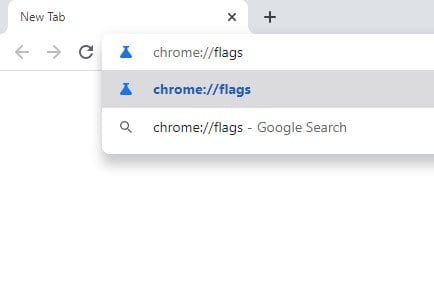
Step 2. Once downloaded, open the Google Chrome beta on your computer. Step 3. Now on the URL bar, type in Chrome://flags and hit the Enter button.
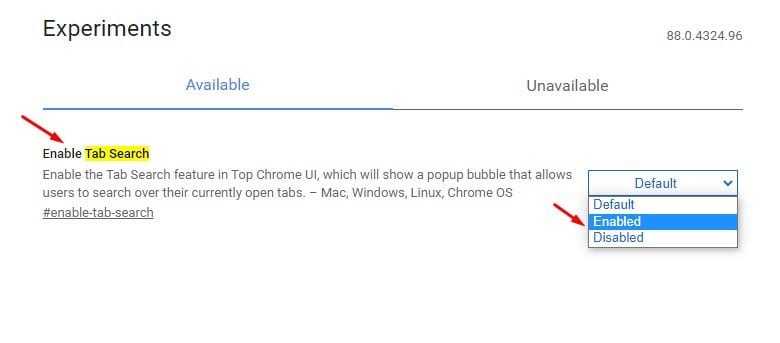
Step 4. Now search for the ‘Tab Search’ feature.
Step 5. Enable the Tab Search flag by using the drop-down menu.
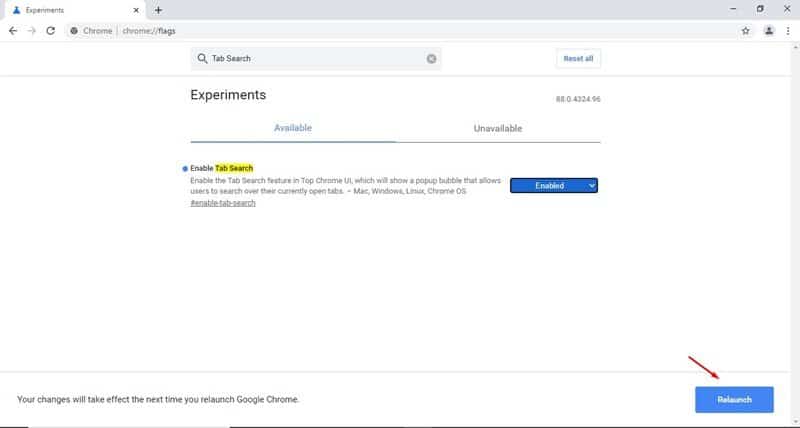
Step 6. Once enabled, click on the ‘Relaunch‘ button to restart the web browser.
Step 7. After the restart, you would notice a drop-down arrow in the top tab bar. Just click on the drop-down arrow to use the tab search feature.
Step 8. It will list all the tabs that were currently opened in the Window. You can search and switch between tabs easily.
That’s it! You are done. This is how you can enable & use the Tab search feature in the Google Chrome browser. This article is all about enabling and using the tab search feature of the Google Chrome web browser. I hope this article helped you! Please share it with your friends also.
Δ


