Well, there is plenty of web browsers available for the Windows operating system, but it was Google Chrome that stands out of the crowd. Compared to all other web browsers, Google Chrome is fast and has far more features. Not just that, but for customizations, Chrome browser has lots of themes to offer as well. The latest version of Google Chrome has a feature known as Hardware acceleration. For those who don’t know, Hardware Acceleration is one of those useful features that can significantly improve the web browsing experience. However, the Hardware Acceleration feature of Google Chrome is quite buggy, and sometimes it misbehaves.
Steps To Enable or Disable Hardware Acceleration In Chrome
So, in this article, we will be sharing a working method that would help you to turn hardware acceleration on or off on the Chrome browser. But, before we share with you a method to enable or disable the Hardware Acceleration, let’s know what it does.
What is Hardware Acceleration?
Hardware Acceleration is a new feature of Google Chrome that uses your computer’s GPU to speed up the process while freeing up the CPU load. The feature is meant to utilize the computer’s GPU to speed up some functions of software running on the CPU alone.
So, instead of relying solely upon the CPU, Hardware acceleration uses the Graphics processing unit to tackle tasks like playing videos, games, or any other graphics-intensive tasks. However, the feature is a little biggy and often causes the web browser to lag, freeze or even crash. Not just that, but few users have also reported that the Hardware Acceleration feature of the Chrome browser drains the laptop’s battery. The problem arises due to a problem with the GPU or driver associated with it. So, if you suspect that the Hardware acceleration feature is the leading cause behind lag, freeze, or crash, then you can disable it.
How To Enable or Disable Hardware Acceleration on Chrome?
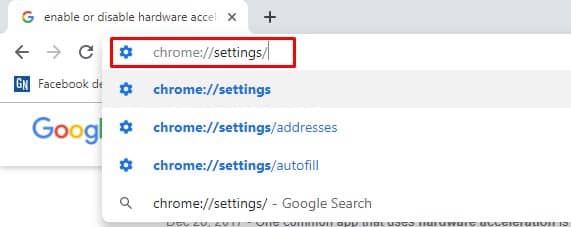
Enabling or disabling Hardware Acceleration on Google Chrome is easy, users need to go through the Settings to turn on or turn off the feature. Follow some of the simple steps listed below to turn hardware acceleration on or off. First of all, open your Google Chrome browser and then click on ‘Settings’. You can also type in chrome://settings/ to open the Settings panel.
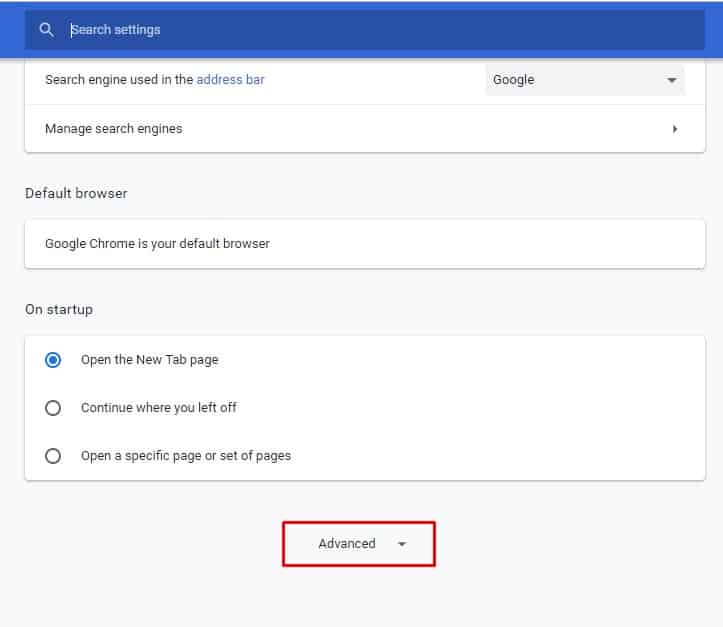
On the Setting panel, scroll down until you find the Advanced option.
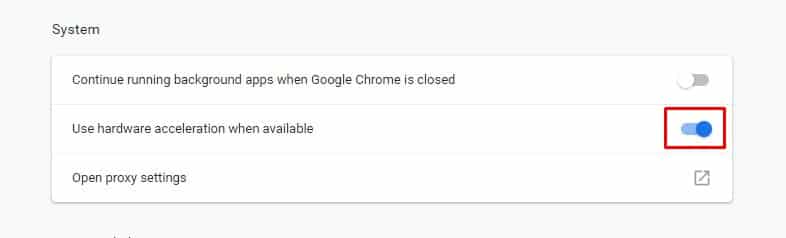
Click on the Advanced option and click on the System section.
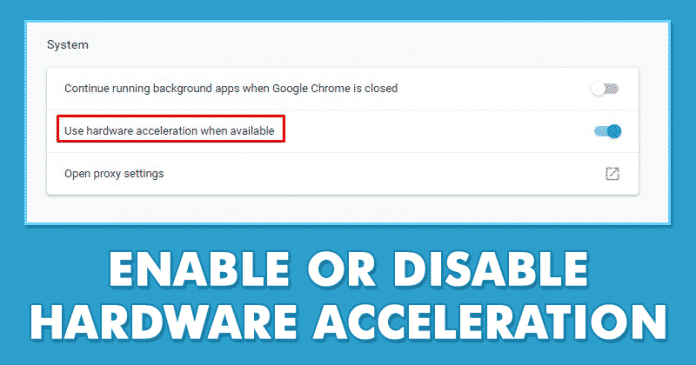
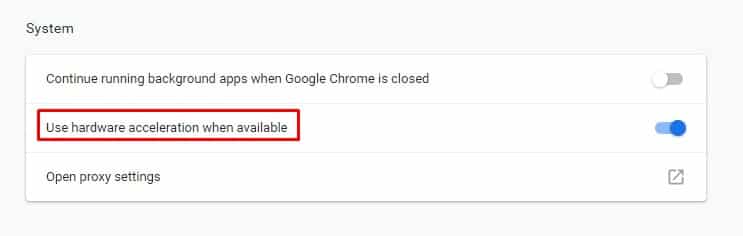
On the System section, search for Use hardware acceleration when available. Now you need to toggle the switch to the On or Off to enable/disable the feature.
This is how you can enable or disable the hardware acceleration feature on the Google Chrome browser. If you have any further doubt, let us know in the comment box below.
Δ