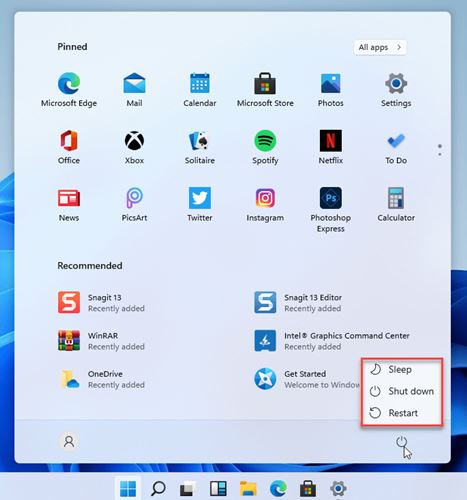
One of the noticeable missing features of Windows 11 is the Hibernate Mode. For those who don’t know, Hibernate is similar to the Sleep mode, but instead of saving your open documents & apps to the RAM, the Hibernate mode saves them to your hard disk.
So, when you turn on the computer again, the Hibernate mode resumes everything where you left off. Although Hibernate option is not available on Windows 11’s start menu, it still can be enabled via the Settings.
Enable & Add Hibernate to the Start Menu in Windows 11
So, if you are interested in enabling Hibernate mode on Windows 11 computers, you are reading the right article. This article will share a step-by-step guide on enabling Hibernate mode on Windows 11 computers. Let’s check out.
First, open Windows 11 Search and type in Control Panel. Then, open the Control Panel from the list.
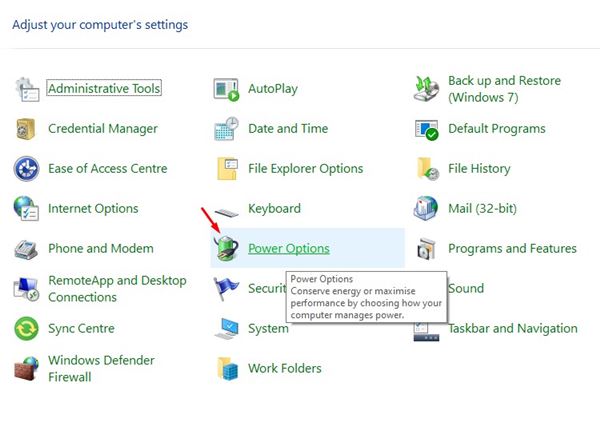
On the Control Panel page, click on the Power Option.
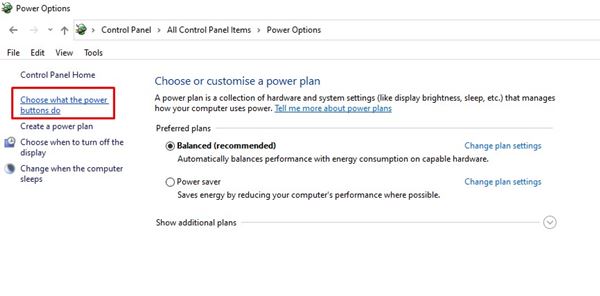
On the Power Options page, click the Choose what the power buttons do option.
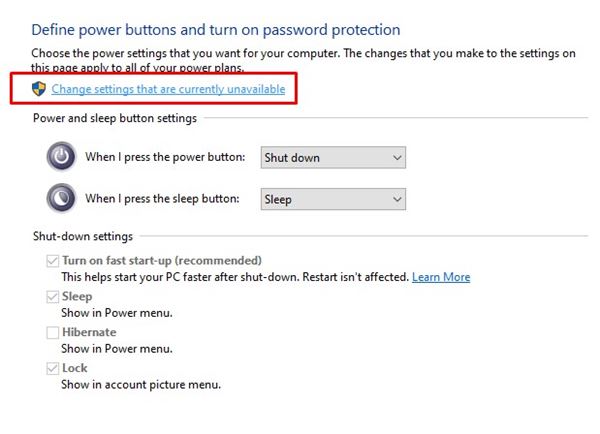
Click on the Change settings currently unavailable option on the next page.
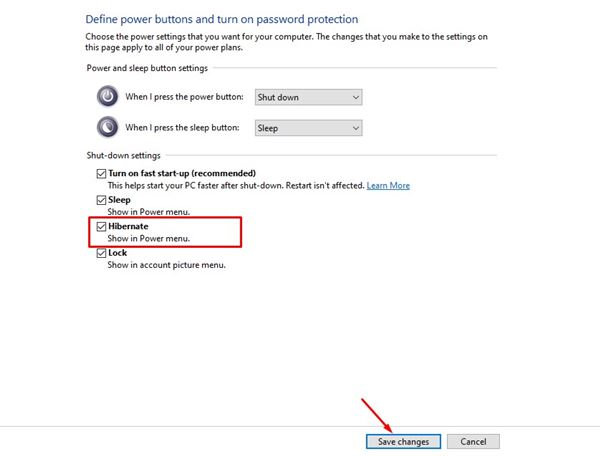
Now scroll down and find the Shutdown Settings option. Enable the Hibernate option and click on the Save changes button.
Once done, click on the Windows 11’s Power button. You will find the new hibernate option there. If you are still confused between Sleep mode and Hibernate, then you need to check our guide, Difference Between Sleep Mode And Hibernate. The article explains the key differences between the Sleep and Hibernate modes in Windows 10 computers. That’s it! You are done. This is how you can enable the hibernate mode in Windows 11 computers. So, this article is all about how to enable and add the hibernate mode to the Start menu in Windows 11. I hope this article helped you! Please share it with your friends also. If you have any doubts about this, let us know in the comment box below.
Δ

