The latest version of Windows – Windows 11 includes a utility that lets you fully backup your system files and apps. You can use this backup to recover the data lost due to hardware failure, upgrade problems, malware attacks, file corruption, etc. Also Read: How to Install the New Windows 11 Paint App on Windows 10
Steps to Create a Full System Backup of Your Windows 11 PC
The backup and Restore function uses the Shadow Copy feature to create a system image that provides an identical copy of all your apps, settings, files, etc. So, in this article, we will share a step-by-step guide on creating a full system backup of your Windows 11.
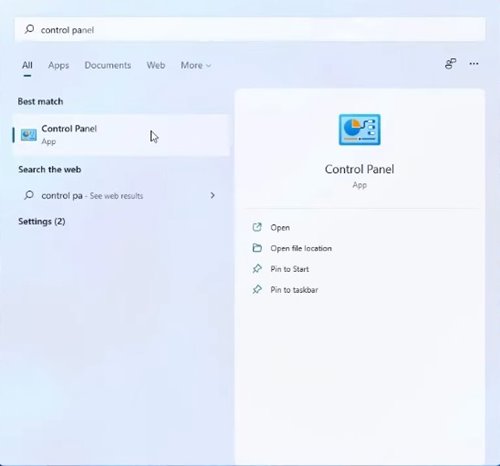
First of all, click on the Windows 11 search button and type in Control Panel. Then, open Control Panel from the list.
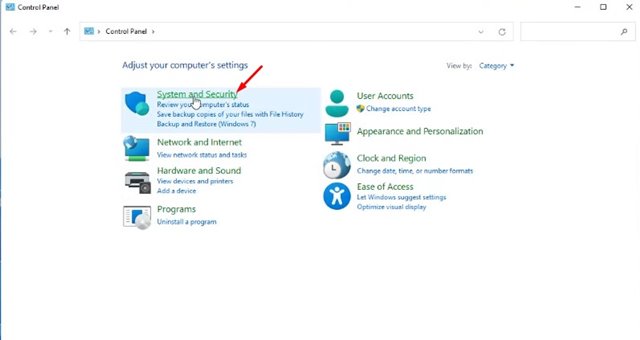
On the Control Panel, click on the System and Security option.
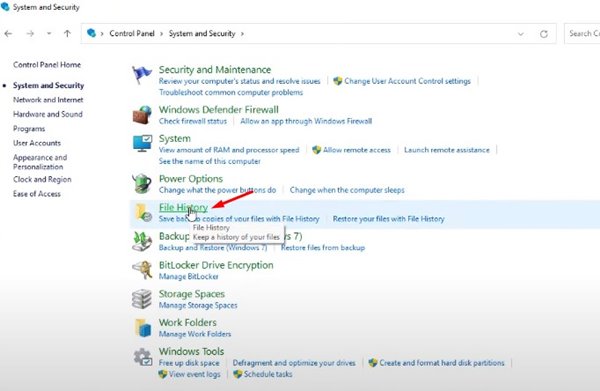
On the next screen, click on the File History option.
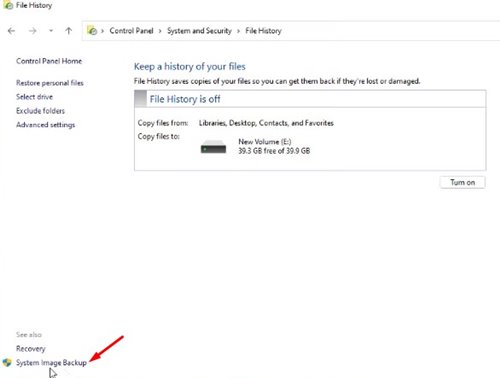
On the next screen, click on the System image backup button located at the bottom left of the screen.
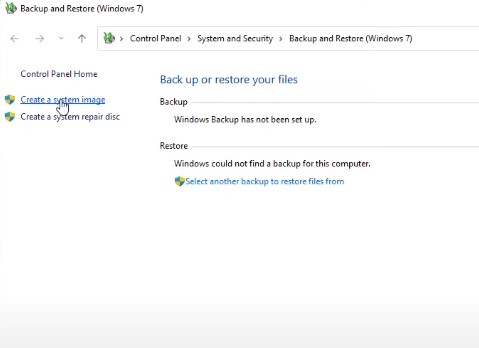
On the left pane, click on the Create a system image option, as shown below.
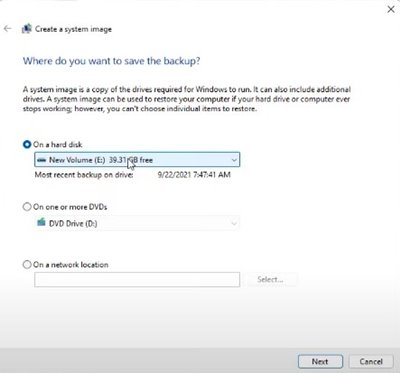
On the Create a system image popup, select the hard disk to save the backup. Here you can use your USB devices as well. Once done, click on the Next button.
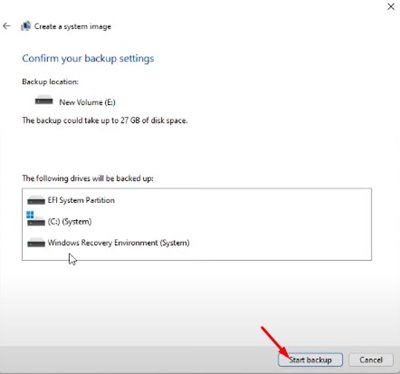
On the next screen, click on the Start Backup option.
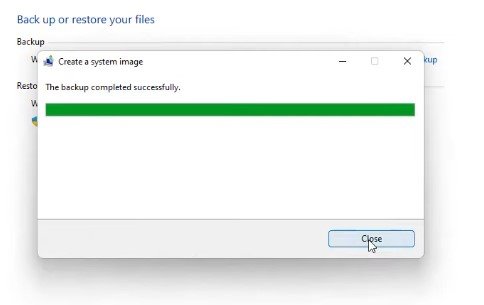
Now, the backup process will begin. Depending on the file space, the backup completion time might vary.
That’s it! You are done. This will complete the full system backup process. So, this guide is all about creating a full system backup of your Windows 11 PC. I hope this article helped you! Please share it with your friends also. If you have any doubts related to this, let us know in the comment box below.
Δ

